Advocating for Safer Schools

advocacyOn April 5, 2018 I had the honor of providing both written and verbal testimony to a joint session of the Senate and Assembly Education Committees in Trenton, NJ. As an educator, I believe it is our responsibility to advocate for our profession, our colleagues, and most of all our students. So even though my verbal testimony was very brief, I was able to submit more detailed written testimony. As this information was submitted and a matter of public record, I want to share it with my professional learning network as motivation for you to also advocate for our profession. Pick something you are passionate about and advocate for it. As you will read, I believe the issue of school safety must be addressed now so we can return to a focus on teaching and learning. 

Submitted Testimony

Good morning and thank you for the opportunity to comment on a topic that is of paramount importance to all of us today and every single school day.

The issue of school safety has been on the minds of those of us in education for a long time. However, there was a time, long ago, when school safety was just a thought of building principals twice a month with the required monthly fire drills.

As building principals, we would pull the alarm, teachers would stop teaching, the students and teachers would go outside, the alarm would be turned off, and everyone would come back inside and instruction would start again. We would document the date and time it took to complete. No one thought otherwise about this rather mundane and bi-monthly ritual.

School violence has changed the way everyone in education thinks about school safety and security. Today, it’s on the minds of every Superintendent, every principal, every teacher, every student and every parent… every day, and every time there is a safety drill or fire alarm.

I know this personally, as both a superintendent and a father. Last month, when my son’s school went into lock down, he texted me asking if it was real. The drill concerned him. I’m happy he was taking the drill seriously. But I’m also bothered that he and students all across our nation have to think every time a lock down is called or a fire alarm goes off that their school could be the next to experience school violence.

It’s important for everyone outside of education to understand that we, the educators in the classrooms, in the school office, and in the Board Office didn’t go to school for this. In fact, most of us did not have a single class in school safety while training to be a teacher or administrator.

What those of us in education do know is that our students must feel safe before they can learn, our teachers need to feel safe to be able to effectively teach, and our communities need to know their schools are safe so they can send their children to school, ready to learn.

In many school districts there is an issue with the most basic aspect of school safety… the school. For many school districts, our schools were constructed long before the issue of school safety and security, and school violence were on the minds of everyone.

In Hamilton Township we have 24 schools. The average age of our schools is over 70 years old and we have 6 that are over 100 years old. Our newest school is 28 years old. They were all built long before we needed to harden our schools so they were not targets for schools violence.

This past September our district proposed a $55.4M referendum. We had a number of areas that required immediate attention. Our first two areas were student and staff safety, and school security. This referendum addressed approximately 56% of the needed repairs and upgrades to our schools. Thanks to our voters, who overwhelmingly supported this school referendum, we are now starting necessary upgrades and repairs but there is more work that needs to be done so our buildings are comparable to neighboring school districts.

With the passage of our referendum we will upgrade camera systems in our schools, install a visitor management system at each school, and replace doors and locks in every classroom and large group instruction rooms. Retrofitting our schools is very expensive but necessary. However, this is just a portion of what we, and many other districts need to further improve school safety and security.

The responsibility of securing our school facilities, holding necessary training, purchasing materials, providing security personnel, and compiling resources needs to be a shared effort, not the sole responsibility of school districts across our state and nation.

We are lucky to have and appreciate the outstanding relationships Hamilton Township School District has with our local police and fire departments, the Mercer County Prosecutor’s Office and the New Jersey Department of Education’s Office of School Preparedness & Emergency Planning. All work with us, provide professional development and engage with us in safety trainings.

To further address our safety and security needs we need to look at school funding:

According to the New Jersey School Funding Formula Hamilton Township should receive: $3,026,919 in security aid.

We are receiving: $630,559 – which is an increase of $0 from the previous year

Funding the difference of $2,396,360 would allow my district to put these funds to good and immediate use. Tangible school safety and security items that would help us address areas we know need to be addressed immediately, while more long term issues could begin to be addressed. We could also expand the resources, staff, and programming related to mental health. This is an area that needs immediate attention for not only school safety but for the overall mental health and wellness of our students and staff. I’m proud to join my fellow Mercer County Superintendents in our Call to Action related to addressing student mental health and teen suicide. We have held one program and planning two more in the near future including an EdCamp for faculty and staff called EdCampYou which will support self-care strategies for those who work with our students every day.

I know school funding and the distribution of those funds has been and will continue to be a discussion and decision at your level. There are many priorities that need to be addressed and funded in our schools. My colleagues and I are well aware of and respect this fact. But I want to reinforce with you that for our students to learn they need to feel safe at school, and for our teachers to be effective educators they need to feel safe at school, and for our community to feel comfortable with sending their children to school, they need to feel like their schools are safe.

If we can make this happen, then maybe someday, in the future when the fire alarm goes off or the school is put in lock down, the students and teachers will think it’s just another drill that is briefly disrupting the learning happening in every classroom, just like those 2 a month fire drills from years past once did.

Until that time I welcome our elected officials to join me and my colleagues in finding ways to make our schools safer for all who learn, teacher, and visit them.

Thank you.

Essential #Twitter Features: Block and Report

Twitter is ideal for connecting, learning, and collaborating with other educators all over the world. Over the years it has enhanced the features of a single Tweet and provided users with tools to control who they see and what content is in their Twitter stream.

Two essential features are the ability to Block and to Report a Tweet or an account. The primary reason for these features are to remove spam and spammers. However, you may have other reasons to use it. There is a difference between the two features and this post will walk you through the process of each.

BLOCK:

Twitter’s Help Center defines the block feature as a way to help you, “control how you interact with other accounts on Twitter. This feature helps users in restricting specific accounts from contacting them, seeing their Tweets, and following them” (Help.twitter.com, 2018).

REPORT:

Twitter allows you to report a Tweet that you feel is abusive, spam, or of a concern. You can also report a profile, or direct message. According to the Twitter Help Center, “You can report Tweets and Direct Messages that are in violation of the Twitter Rules or our Terms of Service. Violations you can report Tweets and Direct Messages that may include spam, abusive or harmful content, impersonation, copyright, or trademark violations. Additionally, you can report any Tweet you see on Twitter, including Tweets in your Home timeline, the Notifications tab, or in Twitter search” (Help.twitter.com, 2018). 

HOW TO BLOCK & REPORT:

The symbol to BLOCK and REPORT are the same on your laptop and phone.

Image_1_Block_&_Report


When you click on the symbol you will get these feature on your computer (your phone will give you a similar look):

Image_2_Block_and_Report


When you click on BLOCK you will get the below message box. As much as I am tempted to BLOCK my friend Brad, you can cancel the BLOCK at this point. But if you choose BLOCK, the account can no longer follow or message you. Additionally, you will not see notifications from this account.

Image_3_Block_&_Report


When you click on REPORT you will get the below message box with three choices. When you pick “It’s Spam” or “It’s abusive or harmful” you will open another window to pick another choice. This is is the feature you want to use when you see spam. But it is also a good feature when you see something inappropriate on Twitter.

Image_4_Block_&_Report

For more information on this feature go to The Twitter Help Center by clicking HERE.

I’m a firm believer that it is educators’ professional responsibility to BLOCK and REPORT spam and inappropriate content. Over the years Twitter has made this easier to for users to do. As a result the experience of Twitter users has improved. 

For more tips and tricks on using Twitter as an educator, check out my book 140 Twitter Tips for Educators – Get Connected, Grow Your Professional Learning Network, and Reinvigorate Your Career: available at Amazon and Barnes and Noble.

51eGYTK0LEL._SX394_BO1,204,203,200_

References:

How to block accounts on Twitter. (2018). Help.twitter.com. Retrieved 3 March 2018, from https://help.twitter.com/en/using-twitter/blocking-and-unblocking-accounts

Report a Tweet or Direct Message. (2018). Help.twitter.com. Retrieved 3 March 2018, from https://help.twitter.com/en/safety-and-security/report-a-tweet

Quick Tip #4 – The New #Google Calendar – 3 Fast Changes

In this final tip on the New Google Calendar, I’m going to explain and demonstrate three fast changes you can make directly on your calendar. The first is changing the color of an event, then deleting an event, and finally changing the time of an event. There is also a bonus tip at the end of the last tip. All of these tips can be done right on the calendar without getting into the details of an event.

Deleting an Event

The first two tips happen with a right click of your mouse or computer scroll pad. Hover over the event you want to delete and right click your mouse or the scroll pad on your laptop/Chromebook. The first choice you will get is to delete the event (see the image below and the red box around the delete option). Click it and the scheduled event is deleted from your calendar. It is that easy!

Tip_4_-_image_1

Deleting an event is simply a right click and then using the Delete option in the screen shown above.

Changing the Color of an Event

The second tip is accessed in exactly the same way as the tip above. Hover over the event that needs to have a color change. Right click your mouse or the scroll pad on your laptop/Chromebook. The window that pops up has both the delete choice and color choices (see the image below and the red box around the color choices). Pick your new event color and if this is a single event, meaning you did not create it to repeat, you are done. If this is an event that repeats, you will get a choice for changing the color of just “This event” or the series of events by clicking “All events”. Take a look at the second image in this section for what those two choices will look like.

Tip_4_-_Image_2

Pick the color of your event by right clicking your mouse.

Tip_4_-_Image_2.1

Google Calendar gives you the option of changing this event or all events that are recurring.


Changing the Time of an Event

Most people will go into the details of an event to change its time. Google Calendar makes it easier so you don’t have to do that. Put your cursor on the event you want to change. You will get a hand on the event. Move the event up or down and the start time and end time will change based on the length of time you initially set for the event. For example, if the event is for one hour and you drag it to another time on the calendar, it will still be for one hour. Now if you want to change the length of an event from an hour to two or three hours or shorten it to thirty minutes, put your cursor on the bottom of the event (see image below and red arrow at the bottom of the event. Your cursor will turn into an arrow pointing up and down. Drag that arrow up to shorten the length of an event and drag it down to increase the length of an event. As you do this you will see the end time of the event change as you drag the event up and down. Your event is now the length of time you want just by dragging the bottom of the event up and down.


BONUS: You can move an event from one date to another just by putting your cursor on the event, left clicking and holding on the event and dragging to the date and time you want the event scheduled. No need for you to go into the details of the event. Just click and drag!

Tip_4_-_Image_3

Changing the time of an event, length of time an event happens or the day of the event is a simple click on the top or bottom of the event, or dragging the event from one day to another.

I hope these 3 +1 bonus tips on Google Calendar help you use the New Google Calendar.

Using your settings for the New Google Calendar is that easy! Give it a try.

For more information on using Google Calendar and other Google Apps, check out Hacking Google for Educators.

If you have other features you use in Google Calendar leave them in the comments section to keep the conversation going. Good luck!


Quick Tip #3 – New #Google Calendar – 3 Features in Your Settings

In Quick Tip #3 for the new Google Calendar I am going to focus on three features in your calendar settings. Many people are afraid of the settings on their calendar but there is nothing to fear. Anything you do can be reversed with a click or a drop down menu! So let’s give it a try.

Step 1

Identify your settings button on the top right of your calendar. It looks like a gear and I’ve provided a screenshot below with a red box around the settings button.

Tip_3_Image_1

Step 2

Click on the gear and you will get a drop down menu with the first item listed as “Settings”. Click on “Settings

Tip_3_Image_2

Step 3

You will now see the general option topics listed on the top left side of your screen (image 1 below) and then those options listed with what you can do within each topic in the middle of your page (image 2 below). Let’s focus on the sections labeled “Event settings” and “View options”.

Tip_3_image_3_-_a

Tip_3_Image_3

Step 4

Let’s start with “Event settings’ and within that section we will work with “Default duration” (see image 1 below). Click on the down arrow on the right of the box labeled “Default duration” and you will see a series of choices (see image 2 below). Now select a new time. In this example I’ve pointed a red arrow to the time I’ve selected. You will notice 15 minutes is highlighted gray. Once you click the box you will then notice that at the bottom of the page Google will telling you “Settings saved”. Your meetings are now set for a default duration of 15 minutes. This allows you to adjust your standard meeting times based on your job, the type of meetings you hold or the minimum meetings you attend are held. I use 60 minutes.

Tip_3_Image_4_-_a

Tip_3_Image_4_-_b

Step 5

Let’s move on to “View options”(see image 1 below with the red boxes identifying the areas to be discussed.) and we will focus on “Reduce the brightness of past events” and “Start week with”.

TIP_3_IMAGE_5_-_A

Reduce the brightness of past events – When an event is finished you can keep it the same brightness as other events or have the color dull when the time has passed. I choose to dull it for the simple reason that it is an easy visual to see where my day is at on my calendar. Simply un-check the blue check box to keep the event color the same brightness (see the image below). Check the box and it will turn into a blue checkbox and the event will reduce in brightness when it’s a past event.

tip_3_image_5_-_b

Start week with – Depending on your position you may or may not need to change the  day your calendar starts. For me, I use Sunday. Simply click the drop down arrow on the right side of the box and you can pick Saturday, Sunday, or Monday (see image below). In this example I’ve selected Monday (see the highlighted gray area around Monday in the image below). Once you click the box you will notice that at the bottom of the page Google will telling you “Settings saved”.

Tip_3_Image_5-c

Using your settings for the New Google Calendar is that easy! Give it a try.

For more information on using Google Calendar and other Google Apps, check out Hacking Google for Educators.

If you have other features you use in Google Calendar leave them in the comments section to keep the conversation going. Good luck!

Quick Tip #2 for the New Google Calendar: Change Calendar View

In my first post in this series on the New Google Calendar I discussed how to quickly add an item to your calendar. In this post I am going to discuss how to quickly change your calendar view. The Google Calendar gives you six options and then two other choices within the view you pick. So open up your new Google Calendar and let’s give it a try.

Step 1

Identify the location to change your view. I’ve provided a screenshot from my computer below and put a red box around the feature we are going to work with in this tip. You will see it says “Week” and has a down arrow. The current view of my calendar is a week view.

Tip_2_-_Image_1_-_Google_Calendar

Step 2

Click on the down arrow next to the word “Week”. You now have six options to select for your calendar view (see image below).

Tip_2_-_Image_2_-_Google_Calendar

Step 3

Select a calendar view. Let’s select “4 days”. In the image I’ve provided below you will see in the top right red box the “4 days” view selected. In the large red box with the dates on the calendar, you will see it has 4 days listed. You can use the calendar as you usually do and enter appointments.

Tip_2_-_Image_3_-_Google_Calendar

Step 4

Use the shortcuts to change your calendar view. Google Calendar makes it easy and quick to change your view. In the below image you will see a red box around the letters next to the various calendar views you can pick. Simply press the letter “D” upper or lower case, it doesn’t matter because it is not case sensitive, and your view will change to the “Day” view. Press the letter “W” and you will get the “Week” view. Give it a try.

Tip_2_-_Image_4_-_Google_Calendar

Step 5

Check out the two calendar view features. The calendar view feature gives you two other options when you pick the view you like. You can “Show weekends” and “Show declined events”. If you see a check mark to the left of either or both of these events then you will see the particular option. Removing the check mark from “Show weekends will remove weekends from all your calendar views. Removing the check mark from “Show declined events” will remove events that you declined when invited. See the below image for the location of these options.

Tip_2_-_Image_5_-_Google_Calendar

For more information on using Google Calendar and other Google Apps for educators, check out Hacking Google for Educators.

If you have features you use in Google Calendar leave them in the comments section to keep the conversation going.

Good luck!

Quick Tip #1 for the New Google Calendar

I’ve upgraded to the new Google Calendar, which has a lot of great features. I’m going to focus on a quick tip for the next few blog posts. Today’s quick tip is focused on  adding an item quickly to your calendar.  So open up your new Google Calendar and let’s give it a try.

Step 1:

Identify the date and time of your event and click in the space. You will then see these two items appear. The first (in blue) is the untitled event with a default time of one hour. The second (in white) is the information you are going to complete for the event.

Step_1_-_Tip_1_-_Google_Calendar

Step 2:

Add a title. Click in “ Add title” and start typing. You will see I’ve typed “Send Monday Agenda”. I’ve created a red box around the title and a red arrow pointing to the appointment in the calendar that automatically updates when you type.

Image_2_-_Tip_1_-_Google_Calendar

Step 3:

Change the date of the event. You can change the date of the event from the calendar box. Once I’ve clicked on the date (I’ve put a red box around it in the image below) it opens up a calendar of the month. It then identifies the current date with a blue circle around the day (see red arrow 1 on the left), the date of the event in a gray circle (see red arrow 2 second from left), and then you can pick any other date on the calendar (see red arrow 3 second from right) and finally you can change the month with the two symbols that look like “< >” on the top right (see red arrow on the right). Let’s change the date to January 17th.

Image_3_-_Tip_1_Google_Calendar

Step 4:

Change the time of the event. You can also change the time of an event from the calendar box. Click on 6:00am and you will get a drop down menu. There are two options before and two options after the current time that are divided in 30 minute intervals (see read arrow on left) and you can scroll through more time options on the right (see red arrow on right) by using the gray scroll box). You can now do the same for the end time. Let’s change the start to 7:00am and the end to 9:00am.

Image_3_-_Tip_1_Google_Calendar_001

Step 5:

Click the save button. Your event is now quickly added to your new Google Calendar. 

Image_4_-_Tip_1_-_Google_Calendar

Your event is now on the calendar (image below):

Image_5_-_Tip_1_Google_Calendar

For more information on using Google Calendar and other Google Apps for educators, check out Hacking Google for Educators.

If you have features you use in Google Calendar leave them in the comments section to keep the conversation going.

Good luck!


Harnessing Your Gmail Inbox – 3 Simple Tips

I once considered email to be a convenient and efficient mode of communication. Today,email image hundreds of messages come into my inbox on a weekly basis and as a result it becomes difficult to manage and communicate properly.

Over the years I’ve tried a bunch of things to become more efficient. Some have worked and some have not. Here’s a few suggestions:

WHAT DIDN’T WORK

  1. Folders for everything – I once tried to create a bunch of folders to move messages to once I read and was done with them.  I found myself always creating folders and forgetting what folders were created or which messages went in what folder. It was too complex of a system.
  2. Responding to email I was cc’d on. Early on, I felt every email required a response. Business etiquette will tell you that being cc’d is an FYI. I now read and follow up with the appropriate person, when necessary.

WHAT DID WORK

  1. Creating one general file folder – I created 1 main folder to move read messages to all_read_email
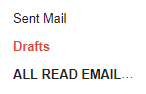
once done. I call mine “All Read Email”. I also have a half dozen other folders for specific large scale items that have a lot of emails coming in on the topic and I want to be able to quickly find those emails. Those include “Inclement Weather” and “Referendum” folders. I go to those often or I may need them quickly
  2. Filter your responses – We receive many emails with lists of people included. Resist the reply to all when you only need to respond to one or a few people on the list. I’ve found that once you reply to all, you get a waterfall of reply to all comments and they are often one word response… like, “Yes”, “Agree”, “Count me in”, “Got it”.
  3. Use the tags feature on your Gmail – This feature is awesome and a great Follow_up_Tagorganization tool. I have created tags for my email so I know what to do with the email after I’ve read it. Three of the tags I use consistently are “Follow-up” which tells me I need to stay on top of this issue, “Social Media” which tells me that the content is something we may want to post on our district’s social media feeds, and “Updates” which means I need to provide the information to a group of people (i.e. Board of Education members, principals, supervisors, faculty).

How to create folders and labels in Gmail are explained in Hack 3 of Hacking Google for Educators.

By finding features on email and procedures that work for you, your inbox can become an efficient communication tool and not a burden. Good luck! Feel free to share your ideas in the comments section. 

Fresh Start in 2018

2018

Since 2012, I have blogged on this site and posted 83 times. That’s not a huge amount. But over the years the number of posts have decreased with every new year. Last year I posted just two blogs. There are numerous reasons for the reduction in production but after my second post in 2017, I made an important decision. I completely stopped blogging and started to observe what others were doing on their sites. I learned a lot from the information they were providing and I think I’m a better educator for taking the time to focus on the content of others. It was a great six months and as I start blogging in 2018 you will see a new look to this site and all the previous posts removed. It’s best if we take a fresh start from time to time in our careers, our learning, and yes… even our blog posts.

After taking time to learn from others, here’s what I bring to 2018 on this blog post:

  1. Shorter posts – getting to the point is important and people don’t have time to read pages of information.
  2. Useful information – I’d like to think everything I’ve posted over the years was useful, but let’s be realistic, it wasn’t. However, I’ll make an effort to provide useful information with the idea that readers can immediately use it.
  3. Celebrate educational trends and trendsetters – there is so much happening, so fast in education and so many educators doing awesome work in our profession. These trends and educational trendsetters need to be identified and celebrated. We learn from each other and what educators are doing in our profession. That’s how we evolve as educators and that’s how we grow our professional learning network. 
  4. Engage in a positive educational conversation – This is all that remains from what I first said in 2012 on this blog post, and what I’ve Tweeted on my Twitter chat, #satchat, since its inception. I believe if we agree to evolve as educators, we need to stay as positive as possible. Although there will be times this may be a challenge, we need to focus more on positive change versus negative. So I’ll continue to keep it positive as we move our profession forward. 

Have a great 2018!